애니메이션 클론코딩 스터디
in SOPT iOS
4주차는 Bezier Path과 CAnimations 에 대하여 공부해보도록 하자.
우선 Bezier Path 의 Bezier 란! 간단하게 말하면 점 몇 개로 곡선을 특정할 수 있는 곡선이다. 이러한 특성 때문에 컴퓨터 그래픽이나 벡터 그래픽에서 곡선을 표현하는 방법으로 많이 쓰이고 있다.
하나의 직선 위를 점 M이 이동하고 있을 때, 당연히 점의 궤적은 직선으로 이루어질 것이며 t는 나아간 정도를 나타낼 것이다. 이때, 점이 이동한 직선을 1차 베지에 곡선이라고 말한다.
위 그림에서 선을 하나 추가하고 그 위를 이동하는 점을 놓으면 아래와 같은 모습으로 나타난다.

이때 M0과 M1을 잇는 선을 점 B를 놓을 수 있다. 점 B가 그리는 궤적이 2차 베지에 곡선이다. 이제 한 번 더 반복해보자. P2를 잇는 선을 하나 그리고 그 위에 점을 하나 더 놓는다. M0과 M1 를 잇는 선 위에 있는 점을 B0으로 생각한다면 M2와 새롭게 놓은 점을 잇는 선 위의 점을 B1이라고 할 때, B0과 B1 을 잇는 선 위에 놓인 점을 만드는 것이다, 이건 마치 재귀,,,
모양 예쁘네 ,,, 위가 바로 3차 베지어 곡선이다. 추가로 4차 베지어 곡선도 만들 수 있지만 이점이 없어 보통 3차 베지어 곡선까지만 사용한다고 한다. 그렇다면 이걸 어떻게 활용해야 할까?
애플디벨로퍼에 검색하였더니 굉장히 많은 내장함수가 있었다. 요고 진짜 사용할만 한걸???
아래와 같이 쭈욱~ 나왔다. 오늘 사용할 것들만 체크해두자!
init(rect: CGRect) - Creates and returns a new Bézier path object with a rectangular path.
init(ovalIn: CGRect) - Creates and returns a new Bézier path object with an inscribed oval path in the specified rectangle.
init(roundedRect: CGRect, cornerRadius: CGFloat) - Creates and returns a new Bézier path object with a rounded rectangular path.
init(roundedRect: CGRect, byRoundingCorners: UIRectCorner, cornerRadii: CGSize) - Creates and returns a new Bézier path object with a rectangular path rounded at the specified corners.
init(arcCenter: CGPoint, radius: CGFloat, startAngle: CGFloat, endAngle: CGFloat, clockwise: Bool) - Creates and returns a new Bézier path object with an arc of a circle.
init(cgPath: CGPath) - Creates and returns a new Bézier path object with the contents of a Core Graphics path.
func reversing() -> UIBezierPath- Creates and returns a new Bézier path object with the reversed contents of the current path.
init() - Creates and returns an empty path object.
init?(coder: NSCoder) - Creates a Bézier path object from data in an unarchiver.
Constructing a path
func move(to: CGPoint) - Moves the path’s current point to the specified location.
func addLine(to: CGPoint) - Appends a straight line to the path.
func addArc(withCenter: CGPoint, radius: CGFloat, startAngle: CGFloat, endAngle: CGFloat, clockwise: Bool) - Appends an arc to the path.
func addCurve(to: CGPoint, controlPoint1: CGPoint, controlPoint2: CGPoint) - Appends a cubic Bézier curve to the path.
func addQuadCurve(to: CGPoint, controlPoint: CGPoint) - Appends a quadratic Bézier curve to the path.
func close() - Closes the most recent subpath.
func removeAllPoints() - Removes all points from the path, effectively deleting all subpaths.
func append(UIBezierPath) - Appends the contents of the specified path object to the path.
var cgPath: CGPath - The Core Graphics representation of the path.
var currentPoint: CGPoint - The current point in the graphics path.
var lineWidth: CGFloat - The line width of the path.
var lineCapStyle: CGLineCap - The shape of the endpoints of a stroked path.
var lineJoinStyle: CGLineJoin - The shape of the joints between connected segments of a stroked path.
var miterLimit: CGFloat - The limiting value that helps avoid spikes at junctions between connected line segments.
var flatness: CGFloat - The factor that determines the rendering accuracy for curved path segments.
var usesEvenOddFillRule: Bool - A Boolean value that indicates whether the even-odd winding rule is in use for drawing paths.
func setLineDash(UnsafePointer<CGFloat>?, count: Int, phase: CGFloat) - Sets the line-stroking pattern for the path.
func getLineDash(UnsafeMutablePointer<CGFloat>?, count: UnsafeMutablePointer<Int>?, phase: UnsafeMutablePointer<CGFloat>?) - Retrieves the line-stroking pattern for the path.
func fill() - Uses the current drawing properties to paint the region that the path encloses.
func fill(with: CGBlendMode, alpha: CGFloat) - Uses the specified blend mode and transparency values to paint the region that the path encloses.
func stroke() - Draws a line along the path using the current drawing properties.
func stroke(with: CGBlendMode, alpha: CGFloat) - Draws a line along the path using the specified blend mode and transparency values.
func addClip() - Uses the clipping path of the current graphics context to intersect the region that the path encloses, and makes the resulting shape the current clipping path.
func contains(CGPoint) -> Bool - Returns a Boolean value that indicates whether the specified point is within the region that the path encloses.
var isEmpty: Bool - A Boolean value that indicates whether the path has any valid elements.
var bounds: CGRect - The bounding rectangle of the path.
func apply(CGAffineTransform) - Transforms all points in the path using the specified affine transform matrix.
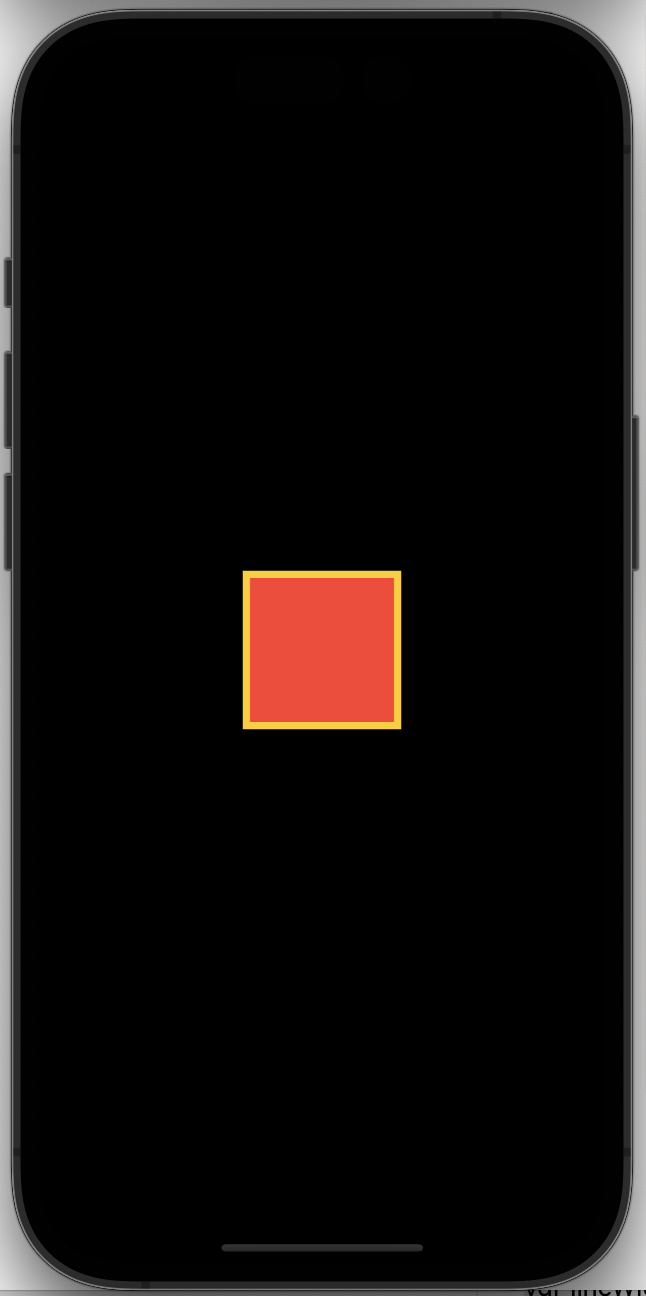
사각형을 그려보자 !
-전체코드
import UIKit

class ViewController: UIViewController {

    override func viewDidLoad() {
        super.viewDidLoad()
        self.view = redView() //아래 class 선언한 뷰 추가하기
    }
}

class redView: UIView {
    override func draw(_ rect: CGRect) {
        drawSqaure()
    }

    func drawSqaure() {
        let path = UIBezierPath(rect: CGRect(x: self.bounds.midX - 50,
                                             y: self.bounds.midY - 50,
                                             width: 100,
                                             height: 100))
        UIColor.systemRed.setFill()
        UIColor.systemYellow.setStroke()
        path.lineWidth = 10
        path.stroke()
        path.fill()
    }
}
코드 쪼개보자!
 let path = UIBezierPath(rect: CGRect(x: self.bounds.midX - 50,
                                             y: self.bounds.midY - 50,
                                             width: 100,
                                             height: 100))
" init(rect: CGRect) - Creates and returns a new Bézier path object with a rectangular path "
위 내장함수는 직사각형 경로가 있는 새로운 베지어 경로 객체를 만들 때 사용한다. 따라서 x 의 좌표, y의 좌표, 너비와 높이까지 정해줄 수 있다.
path.lineWidth = 10
path.stroke()
path.fill()
- var lineWidth: CGFloat - The line width of the path
lineWidth 는 경로의 선 너비를 정할 수 있다. (선 두께!)
- func stroke() - Draws a line along the path using the current drawing properties
그리기 속성을 사용하여 경로를 따라 선을 그리는 함수다. func stroke(with :~, alpha:~) 를 사용하면 투명도를 사용하여 경로를 따라 선을 그릴 수 있다.
- func fill() - Uses the current drawing properties to paint the region that the path encloses
현재 경로가 둘러싸는 영역을 그리는 함수다. func fill(with :~, alpha:~) 를 사용하면 투명도를 사용하여 둘러싸는 영역을 그릴 수 있다.
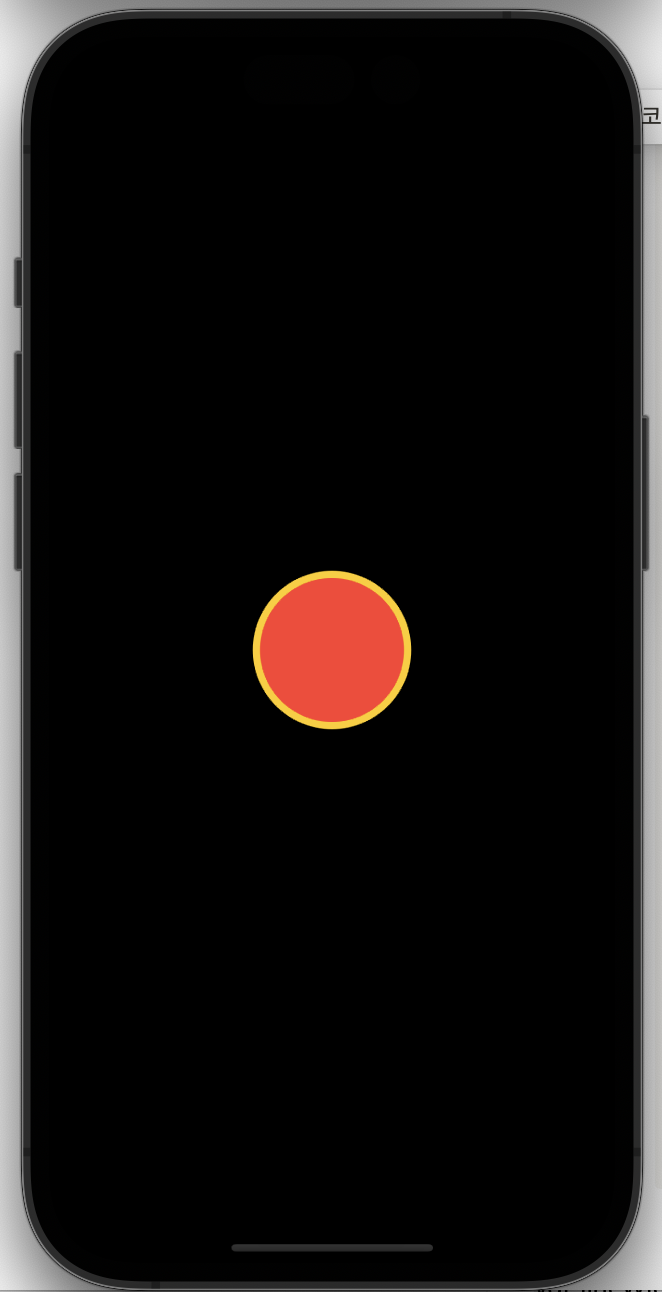
원을 그려보자 !
애플 디벨로퍼 문서에서 찾은 내장함수를 보면 답을 알 수 있다. 위에서는 사각형을 그리기 위해 init(rect: CGRect) 를 사용하였는데 원을 그리고 싶을 땐 위에서 사용한 함수 대신 init(ovalIn: CGRect)을 사용하면 될 것이다!
-전체코드
import UIKit

class ViewController: UIViewController {

    override func viewDidLoad() {
        super.viewDidLoad()
        self.view = redView()
    }
}

class redView: UIView {
    override func draw(_ rect: CGRect) {
        drawCircle()
    }

    func drawCircle() {
        let path = UIBezierPath(ovalIn: CGRect(x: bounds.midX - 50,
                                                          y: bounds.midY - 50,
                                                          width: 100,
                                                          height: 100))
        UIColor.systemRed.setFill()
        UIColor.systemYellow.setStroke()
        path.lineWidth = 10
        path.stroke()
        path.fill()
    }
}
바뀐 것은 위에서 언급한 ovalIn 뿐이다.
- init(ovalIn: CGRect) - Creates and returns a new Bézier path object with an inscribed oval path in the specified rectangle.
원을 그리고 싶을 때 사용할 수 있다.
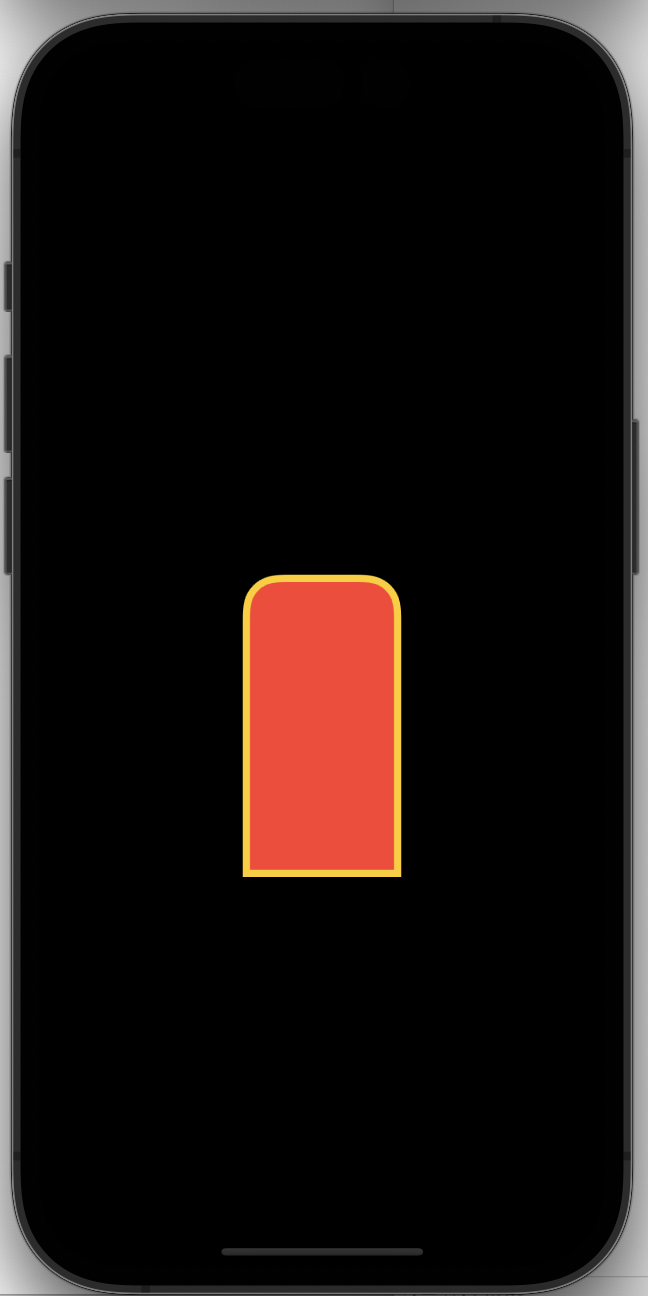
특정 부분만 둥근 사각형을 그려보자 ! 이때는 init(roundedRect:CGRect, cornerRadius: CGFloat) 를 사용하면 될 것이다.
-전체코드
import UIKit

class ViewController: UIViewController {

    override func viewDidLoad() {
        super.viewDidLoad()
        self.view = redView()
    }
}

class redView: UIView {
    override func draw(_ rect: CGRect) {
        drawRoundSquare()
    }

    func drawRoundSquare() {
            let path = UIBezierPath(roundedRect: CGRect(x: bounds.midX-50,
                                                       y: bounds.midY-50,
                                                       width: 100,
                                                       height: 200),
                                            byRoundingCorners: [UIRectCorner.topRight,
                                                                UIRectCorner.topLeft],
                                            cornerRadii: CGSize(width: 20,
                                                                height: 20))
        UIColor.systemRed.setFill()
        UIColor.systemYellow.setStroke()
        path.lineWidth = 10
        path.stroke()
        path.fill()
    }
}
func drawRoundSquare() {
            let path = UIBezierPath(roundedRect: CGRect(x: bounds.midX-50,
                                                       y: bounds.midY-50,
                                                       width: 100,
                                                       height: 200),
                                            byRoundingCorners: [UIRectCorner.topRight,
                                                                UIRectCorner.topLeft],
                                            cornerRadii: CGSize(width: 20,
                                                                height: 20))
- init(roundedRect: CGRect, byRoundingCorners: UIRectCorner, cornerRadii: CGSize) - Creates and returns a new Bézier path object with a rectangular path rounded at the specified corners.
사실 한 쪽이 둥근 직사각형을 그리고 싶을 때는 init(roundedRect: CGRect, cornerRadius: CGFloat) 를 사용하여 간단하게 그려줄 수도 있지만 직접 곡선의 위치와 굴곡을 정해주고 싶을 때는 위처럼 써주면 된다.
CGRect 에서 좌표를 구하였다. byRoundingCorners 에서 어디에서 곡선을 줄지 정하였고, cornerRadii 에서 굴곡을 정해주었다. 만약 byRoundingCorners 에서 topRight 가 아닌 bottomRight 라면?

오 아주 잘되는군,,, 생각보다 이거 진짜 쓸만한데? 자주 쓰겠는데?
CAnimations 란?
그림을 그리고 싶을 때 그래픽적인 접근이 필요한데, 그때 GPU 에서 직접적인 실행을 할 수 있도록 한 OpenGL 이라는 것을 사용한다. 이 오픈지엘 이라는 것이 너무 복잡하고 어렵기 때문에 Apple 에서 만든것이 바로 CoreAnimation ! 따라서 화면에 직접적으로 그림을 그리는 행위 자체는 CoreAnimation 에게 맡기고 우리는 CALayer 라는 Layer 에 그리도록 하는 것이다.
그림을 그릴 수 있다는 것 때문에 두근두근,,, 하지만 많은 애니메이션이 넣을 경우 성능상 문제가 생긴다고 한다 하하^^ 그럼 우선 시작해보자!
-전체코드
import UIKit

class ViewController: UIViewController {

    override func loadView() {
        super.loadView()
        let view = testView(frame: UIScreen.main.bounds)
        view.setAnimateBackGround()
    }

    override func viewDidLoad() {
        super.viewDidLoad()
    }
}

class testView: UIView {
    override init(frame: CGRect) {
        super.init(frame: frame)
    }

    required init?(coder: NSCoder) {
        fatalError("init(coder:) has not been implemented")
    }

    override func draw(_ rect: CGRect) {
        self.backgroundColor = .white
    }

    internal func setAnimateBackGround() {
        let animation = CABasicAnimation(keyPath: "backgroundColor")
        animation.duration = 4
        animation.fromValue = UIColor.red.cgColor
        animation.toValue = UIColor.blue.cgColor
        animation.isRemovedOnCompletion = false
        self.layer.add(animation, forKey: "backgroundAni")
    }
}
뜯어보자!
-ViewController
class ViewController: UIViewController {

    override func loadView() {
        super.loadView()
        let view = testView(frame: UIScreen.main.bounds)
        //UIScreen.main 이 화면의 총 사이즈 //강제로 화면을 잡아준것
        //.bounds 가 frame
        super.view = view
        view.setAnimateBackGround()
    }

    override func viewDidLoad() {
        super.viewDidLoad()
    }
}
loadView() 가 뷰를 만드는 메서드고, viewDidLoad() 가 말 그대로 뷰가 메모리에 로드 되고 난 후에 불리는 메서드다. 따라서 loadView() 에서 먼저 뷰를 만들어주고, viewDidLoad() 를 호출한다. 따라서 loadView() 가 선언된 후에 viewDidLoad() 가 선언된다. 따라서 loadView() 에서 먼저 뷰를 깔아주고 viewDidLoad() 를 불러온다. 더 쪼개보자!
override func loadView() {
        super.loadView()
        let view = testView(frame: UIScreen.main.bounds)
        super.view = view
        view.setAnimateBackGround()
}
let view 를 선언하여 testView 클래스를 담았다. UIScreen.main 이란 화면의 총 사이즈를 강제로 잡아준 것을 의미한다. bounds 는 frame 을 의미하는 것이다. 사실 (frame: UIScreen.main.bounds) 요 부분을 선언하지 않아도 자동으로 화면의 총 사이즈로 맞춰주기 때문에 굳이 안해도 되지만 해주었다~! 그리고 super.view 를 testView 를 담은 view 로 갈아껴주었다. (갈아낀다는 건 스장님 말투) 그다음 setAnimateBackGround() 함수를 실행해주었다. 요걸 선언해야~ 화면이 바뀐다!
-testView : setAnimateBackGround()
internal func setAnimateBackGround() {
let animation = CABasicAnimation(keyPath: "backgroundColor")
animation.duration = 4
animation.fromValue = UIColor.red.cgColor
animation.toValue = UIColor.blue.cgColor
animation.isRemovedOnCompletion = false
self.layer.add(animation, forKey: "backgroundAni")
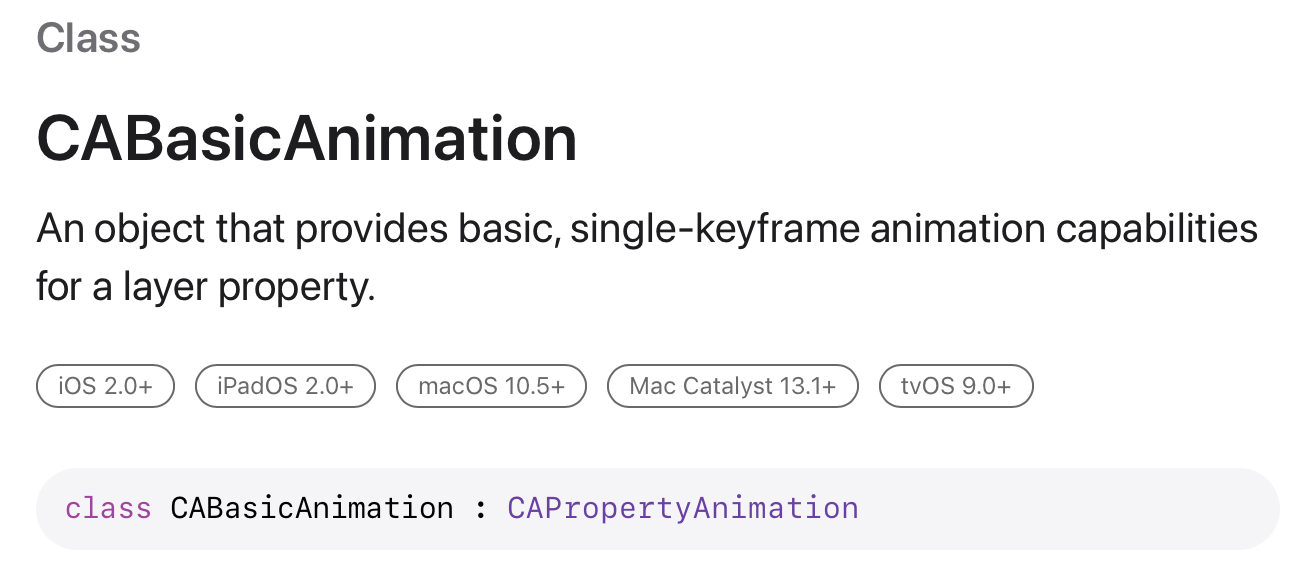
}animation 을 선언하여 CABasicAnimation 의 기능들을 사용할 수 있게 하였다. CABasicAnimation 이 무엇인지 알아보자
opacity : 투명도
backgroundColor : 배경 색상
position : 위치
transform.scale.x : X축으로의 크기
transform.scale.y : Y축으로의 크기
transform.rotation : 회전
shadowColor: 그림자 색상
shadowOffset : 그림자 위치
shadowOpacity : 그림자 투명도
strokeEnd : Path의 끝 부분
strokeStart : Path의 시작부분
strokeColor : Path의 색상
위 코드에서 쓰인 기능을 조금 더 살펴보자면,
animation.duration = 4
- 4초간 애니메이션을 유지하겠다
animation.fromValue = UIColor.red.cgColor
- UIColor.red.cgColor에서 시작하여
animation.toValue = UIColor.blue.cgColor
- UIColor.blue.cgColor로 끝내겠다.
animation.isRemovedOnCompletion = false
- 애니메이션이 끝나면 layer는 화면에서 사라지게 되고 원래 layer가 화면에 나타나게 되는데 이를 막아주는 것이 .isRemovedOnCompletion 이다. 따라서 디폴트는 true 로 선언되고 위처럼 false 로 바꿔주면 애니메이션이 끝나도 layer 가 화면에 나타나지 않게 된다.
그렇다면 CABasicAnimation + Bezier Path 를 이용하여 실습 해보자!

-전체코드
import UIKit
import SnapKit

class ViewController: UIViewController {

    override func loadView() {
        super.loadView()
        let progressView = ProgressView(frame: .init(origin: .zero, size: .init(width: 100,
                                                                                height: 100)))
        self.view.addSubview(progressView)
        progressView.snp.makeConstraints {
            $0.centerX.centerY.equalToSuperview()
            $0.width.height.equalTo(100)
        }
        progressView.progressAnimation(duration: 5, value: 1)


    }

    override func viewDidLoad() {
        super.viewDidLoad()
    }
}


class ProgressView: UIView {
    private var circleLayer = CAShapeLayer()
    private var progressLayer = CAShapeLayer()
    private var startPoint = CGFloat(3 * Double.pi / 4)
    private var endPoint = CGFloat(Double.pi / 4)

    override func draw(_ rect: CGRect) {
        createCircularPath()
    }

    func createCircularPath() {
        self.backgroundColor = .white
        let circularPath = UIBezierPath(arcCenter: .init(x: self.frame.width / 2.0,
                                                         y: self.frame.height / 2.0),
                                        radius: (frame.size.height - 10) / 2.0 ,
                                        startAngle: startPoint,
                                        endAngle: endPoint,
                                        clockwise: true)
        // 여기서부터
        circleLayer.path = circularPath.cgPath
        circleLayer.fillColor = UIColor.clear.cgColor
        circleLayer.lineCap = .round
        circleLayer.lineWidth = 3
        circleLayer.strokeEnd = 1.0
        circleLayer.strokeColor = UIColor.black.withAlphaComponent(0.4).cgColor
        layer.addSublayer(circleLayer)
        // 여기까지 없애도 잘 돌아감

        progressLayer.path = circularPath.cgPath
        progressLayer.fillColor = UIColor.clear.cgColor
        progressLayer.lineCap = .round
        progressLayer.lineWidth = 3
        progressLayer.strokeEnd = 0
        progressLayer.strokeColor = UIColor.red.cgColor
        layer.addSublayer(progressLayer)
    }

    func progressAnimation(duration: TimeInterval, value: Double) {
        // created circularProgressAnimation with keyPath
        let circularProgressAnimation = CABasicAnimation(keyPath: "strokeEnd")
        // set the end time
        circularProgressAnimation.duration = duration
        circularProgressAnimation.toValue = value
        circularProgressAnimation.fillMode = .forwards
        circularProgressAnimation.isRemovedOnCompletion = false
        progressLayer.add(circularProgressAnimation, forKey: "progressAnim")
    }
}
그럼 쪼개보자!
-ViewController
class ViewController: UIViewController {

    override func loadView() {
        super.loadView()
        let progressView = ProgressView(frame: .init(origin: .zero, size: .init(width: 100,
                                                                                height: 100)))
        self.view.addSubview(progressView)
        progressView.snp.makeConstraints {
            $0.centerX.centerY.equalToSuperview()
            $0.width.height.equalTo(100)
        }
        progressView.progressAnimation(duration: 5, value: 1)


    }

    override func viewDidLoad() {
        super.viewDidLoad()
    }
}
바로 전 ViewController 와 비슷한 흐름이다. view 를 Progressview 로 선언하고 함수도 야무지게 불러주었다!
- ProgressView : createCircularPath()
func createCircularPath() {
        self.backgroundColor = .white
        let circularPath = UIBezierPath(arcCenter: .init(x: self.frame.width / 2.0,
                                                         y: self.frame.height / 2.0),
                                        radius: (frame.size.height - 10) / 2.0 ,
                                        startAngle: startPoint,
                                        endAngle: endPoint,
                                        clockwise: true)
        circleLayer.path = circularPath.cgPath
        circleLayer.fillColor = UIColor.clear.cgColor
        circleLayer.lineCap = .round
        circleLayer.lineWidth = 3
        circleLayer.strokeEnd = 1.0
        circleLayer.strokeColor = UIColor.black.withAlphaComponent(0.4).cgColor
        layer.addSublayer(circleLayer)

        progressLayer.path = circularPath.cgPath
        progressLayer.fillColor = UIColor.clear.cgColor
        progressLayer.lineCap = .round
        progressLayer.lineWidth = 3
        progressLayer.strokeEnd = 0
        progressLayer.strokeColor = UIColor.red.cgColor
        layer.addSublayer(progressLayer)
}
우선 createCircularPath() 함수부터 뜯어보자.
init(arcCenter: CGPoint, radius: CGFloat, startAngle: CGFloat, endAngle: CGFloat, clockwise: Bool)- Creates and returns a new Bézier path object with an arc of a circle.
요 기능은 베지어 함수로 원의 호를 그려준다. center 는 원의 중심점, radius 는 원의 반경, startAngle 은 호의 끝 각도(라디안으로 측정), clockwise 는 호를 그릴 방향 으로 작성할 수 있다.따라서 circleLayer 로 진행 과정을 그릴 호를 잡아주고, progressLayer.path = circularPath.cgPath 를 선언하여 circularPath 의 경로를 따라가도록 하였다.
- ProgressView : progressAnimation()
func progressAnimation(duration: TimeInterval, value: Double) {
        // created circularProgressAnimation with keyPath
        let circularProgressAnimation = CABasicAnimation(keyPath: "strokeEnd")
        // set the end time
        circularProgressAnimation.duration = duration
        circularProgressAnimation.toValue = value
        circularProgressAnimation.fillMode = .forwards
        circularProgressAnimation.isRemovedOnCompletion = false
        progressLayer.add(circularProgressAnimation, forKey: "progressAnim")
}
이제 CABasicAnimation 를 넣어보자! 이 코드에서는 keyPath 를 strokeEnd 로 잡아주었는데, strokeEnd 는 Path 의 끝 부분을 나타낸다. 따라서 진행도의 끝부분에 베지어곡선을 가지고 애니메이션을 주겠다는 의미다.
fillMode = .forwards 로 선언한 부분은 애니메이션이 끝난 후 마지막으로 보여지는 상태로 남길 것인가, 되돌릴 것인가에 대한 설정을 forward 로 선언해 남아있도록 하였다. backwards, removed 를 사용하면 끝에 없어지고, forward, both 를 사용하면 끝나고도 남아있는다. 각각의 차이점은 ---
잘 만든 호에 애니메이션을 주고 싶다면, progressAnim 을 사용하면 된다. 이를 통해 progressLayer.add (circularProgressAnimation, forKey: "progressAnim") 를 선언하여 진행하도록 만들어 주었다.
이로써 애니메이션 스터디 종-강!
'32YB SOPT > 애니메이션 스터디' 카테고리의 다른 글
| [SOPT] 애니메이션_3주차 (ContentOffset, Skeleton Animation) (0) | 2023.06.13 |
|---|---|
| [SOPT] 애니메이션_2주차 (UIGestureRecognizer 중 UIPanGestureRecognizer) (0) | 2023.04.30 |